- Introduction
- Installing Cloudmos Deploy
- SDL Overview
- Deploying to a provider
- Initializing Owncast
- Streaming
- Review
- Additional resources
Introduction
Purpose
The purpose of this guide is to demonstrate how an individual can broadcast live video using a self-hosted application deployed on Akash Network. This guide assumes the reader is familiar with the Cosmos ecosystem and has an understanding of the use of wallets as well as a general familiarity with technology: system resources and basic networking. This guide will provide a very broad, in-context overview of technologies such as Docker and Kubernetes. This guide will not cover fine-tuning a streaming environment, only assuming that the reader has a basic understanding of using Open Broadcaster Software (OBS).
In this guide, we will be setting up Owncast (demo):
Owncast is an open source, self-hosted, decentralized, single user live video streaming and chat server for running your own live streams similar in style to the large mainstream options. It offers complete ownership over your content, interface, moderation and audience.
Prerequisites:
- Open Broadcaster Software (OBS)
- a wallet with at least 5 AKT available
Disclaimer
Per Cloudmos:
- Cloudmos Deploy is currently in BETA. We strongly suggest you start with a new wallet and a small amount of AKT until we further stabilize the product.
- We’re not responsible for any loss or damages related to using the app.
- The app has a high chance of containing bugs since it’s in BETA, use at your own risk.
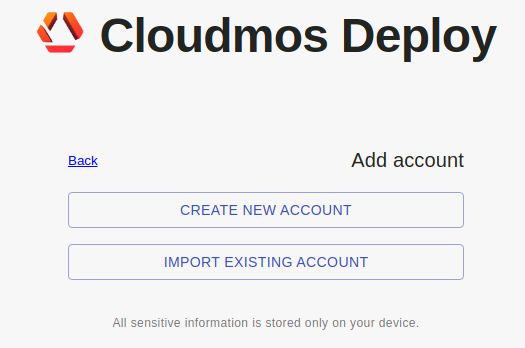
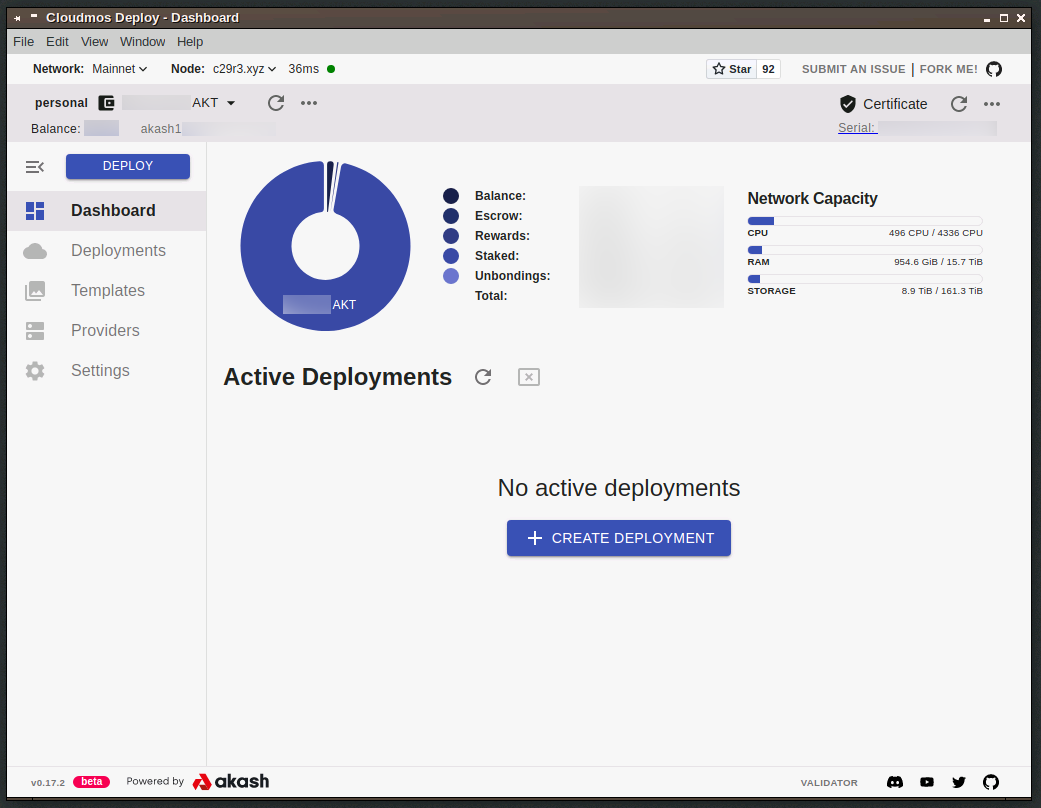
Installing Cloudmos Deploy
While there are several ways to deploy to Akash Network including via command line or web interface, we will be using Cloudmos Deploy. Compiled Windows, macOS, and Linux binaries are available on Cloudmos’ website - use whatever platform you’re familiar with. Running the executable, you will be prompted to create or import a wallet - choose either option and proceed. At first launch, you will need to create a certificate for deployment. Select the ellipsis to the right of the Certificate status and click “Create Certificate."
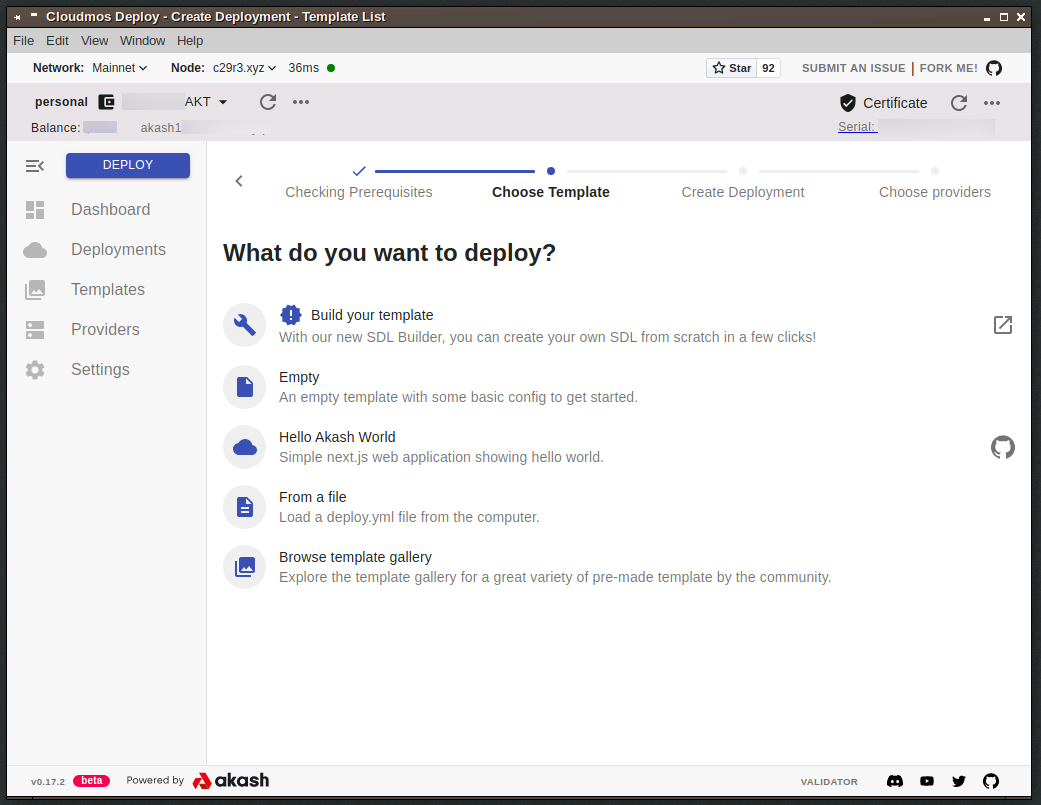
SDL Overview
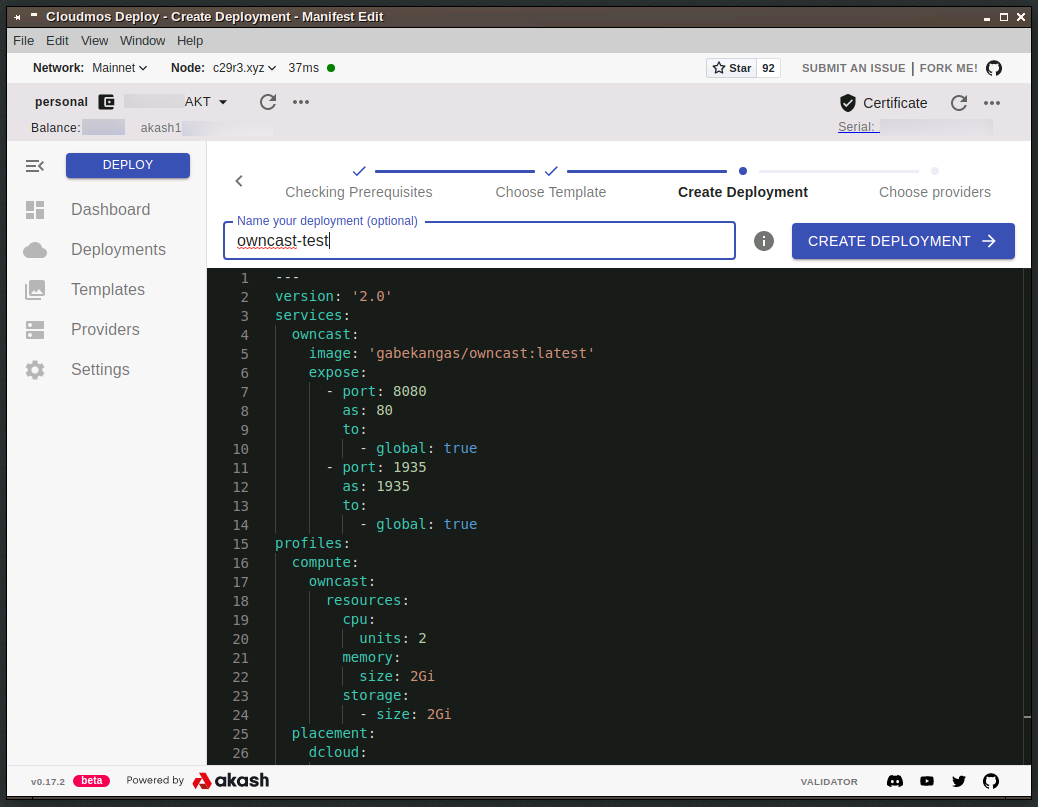
Click “Create Deployment” and start with an empty template. We will use the following SDL created using the Cloudmos SDL Builder:
---
version: '2.0'
services:
  owncast:
    image: 'gabekangas/owncast:latest'
    expose:
      - port: 8080
        as: 80
        to:
          - global: true
      - port: 1935
        as: 1935
        to:
          - global: true
profiles:
  compute:
    owncast:
      resources:
        cpu:
          units: 2
        memory:
          size: 2Gi
        storage:
          - size: 2Gi
  placement:
    dcloud:
      pricing:
        owncast:
          denom: uakt
          amount: 1000
deployment:
  owncast:
    dcloud:
      profile: owncast
      count: 1
This SDL tells a provider to:
- define a service with the name “owncast” and pull the owncast image with the tag “latest” from the user gabekangas on Docker Hub (Lines 1-5)
- globally expose port 8080 (used by the application’s web server) as port 80 (Lines 6-10)
- globally expose port 1935 as 1935 (Lines 11-14)
- utilize 2 vCPU units, 2GiB of RAM, and 2GiB of disk space in the form of ephemeral storage (Lines 15-24)
- look for leases in any region with a minimum bid of 1000 uAKT (Lines 25-30)
- deploy one instance of this service (Lines 31-35)
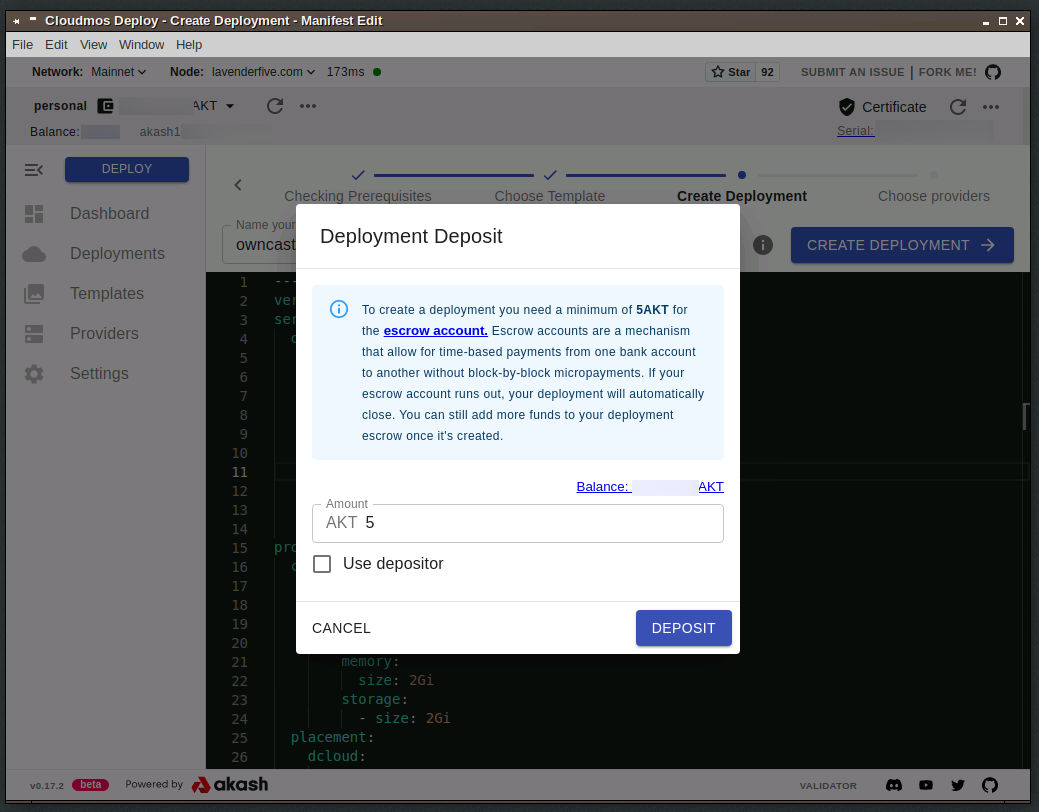
Copy and paste the SDL into the empty template field and click Create Deployment. 5 AKT is required to be deposited in escrow to initiate the deployment. Click Deposit and proceed using Average gas fees.
Deploying to a provider
When streaming video, you want to be mindful of the host’s region due to network latency - don’t choose a provider on the other side of the world even if they offer the lowest deployment cost. In this tutorial, we will be accepting a bid from provider.bdl.computer as it’s both the lowest lease cost and situated in a favorable location relative to my home PC. Select a provider, accept the bid, submit the transaction, and upon success, the manifest will be sent.
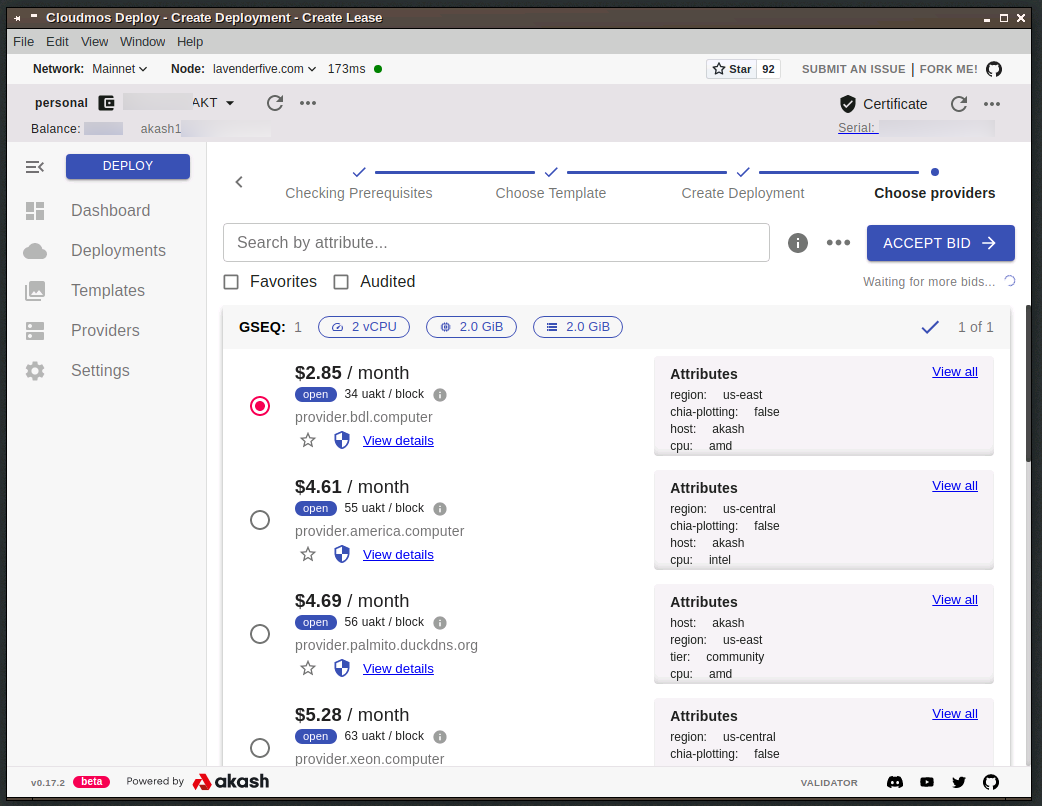

It’s worth mentioning the “Audited” checkbox: while our provider in this example is audited (indicated by the shield icon), unaudited providers are also worth considering. Audited vs. unaudited should not be interpreted as “functional vs. nonfunctional” or “safe vs. unsafe,” only that some providers have not gone through a formal review process of their structure and operations.
After a few seconds, Cloudmos Deploy will switch over to the Logs tab in your Deployment, highlighting Events as your Docker image is pulled and the container is created. If you tab over to Logs, you will see application-specific logs. These will be different for each image and provider and you don’t necessarily need to know what’s going on every time - just know that this is generally where you want to look if you’re having issues deploying a particular image. The Events tab will show you what’s happening relative to Kubernetes, Logs will show items specific to the Docker image(s) you’re using.
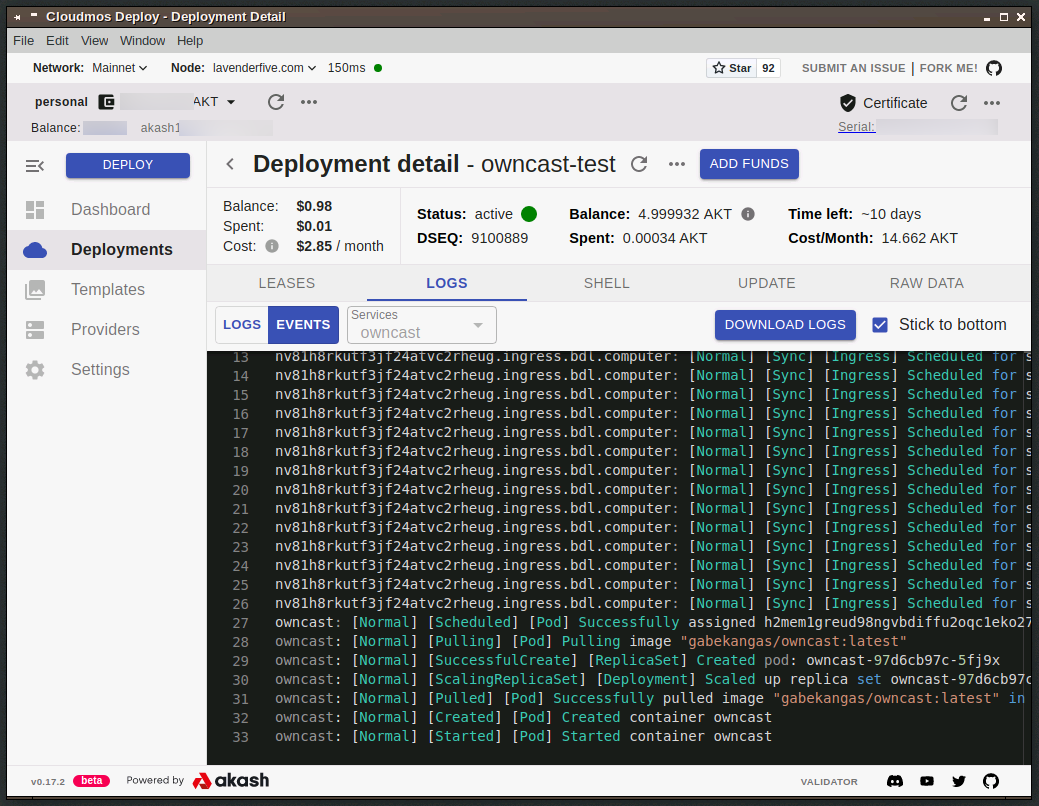
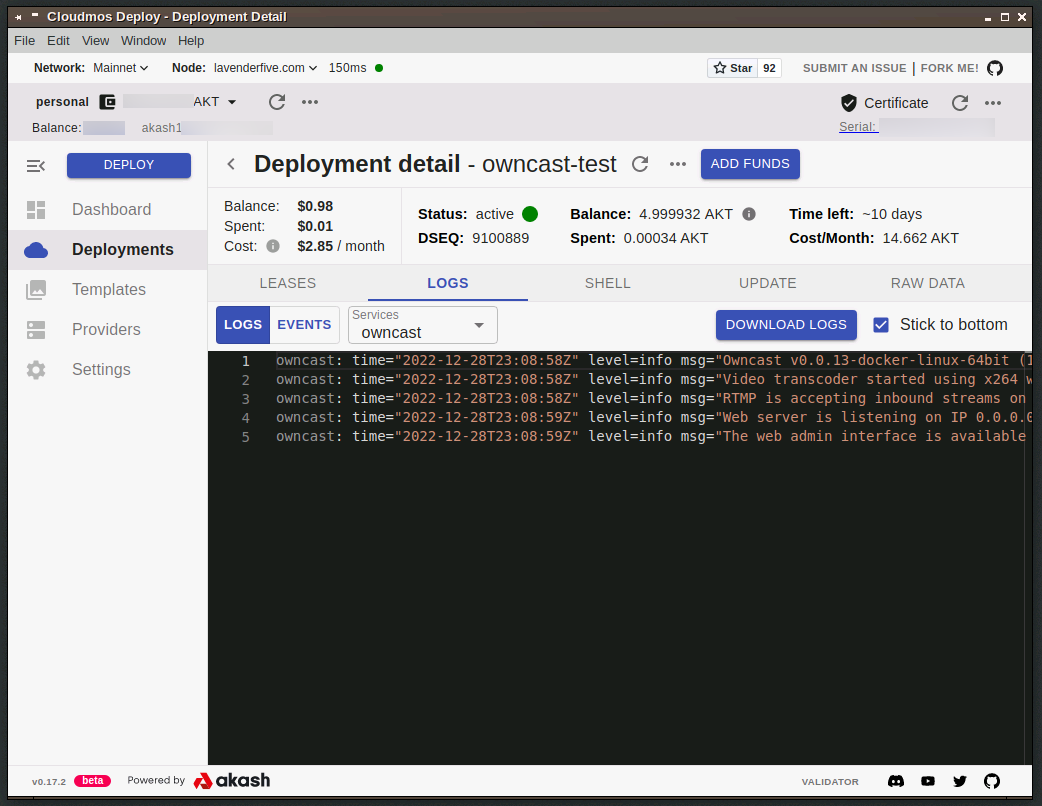
We can see from lines 27 to 33 in Events that our image has been pulled and the container has been started, and we can see in Logs that the web server is listening. Let’s return to the Dashboard.
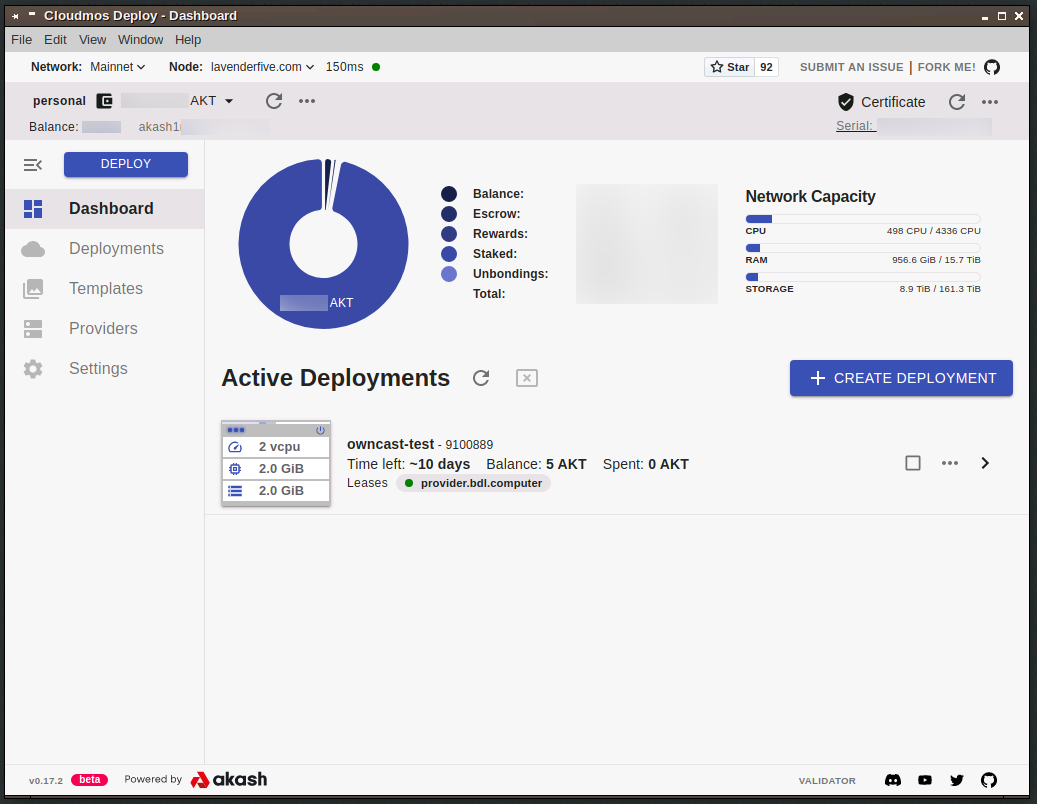
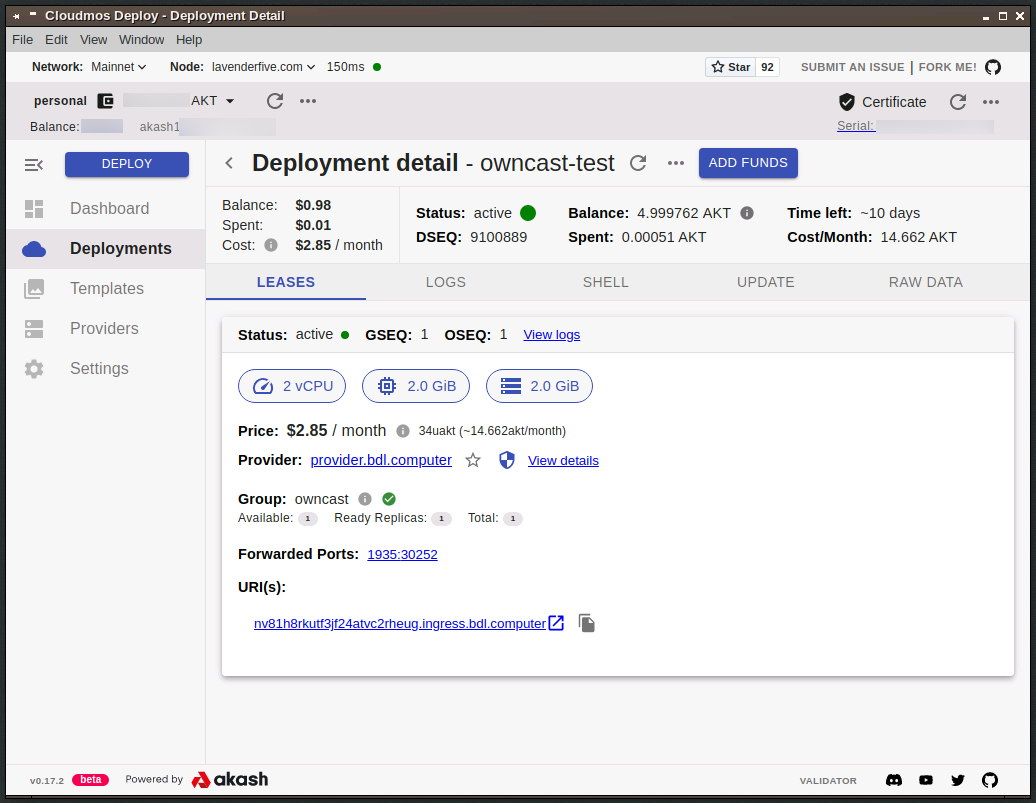
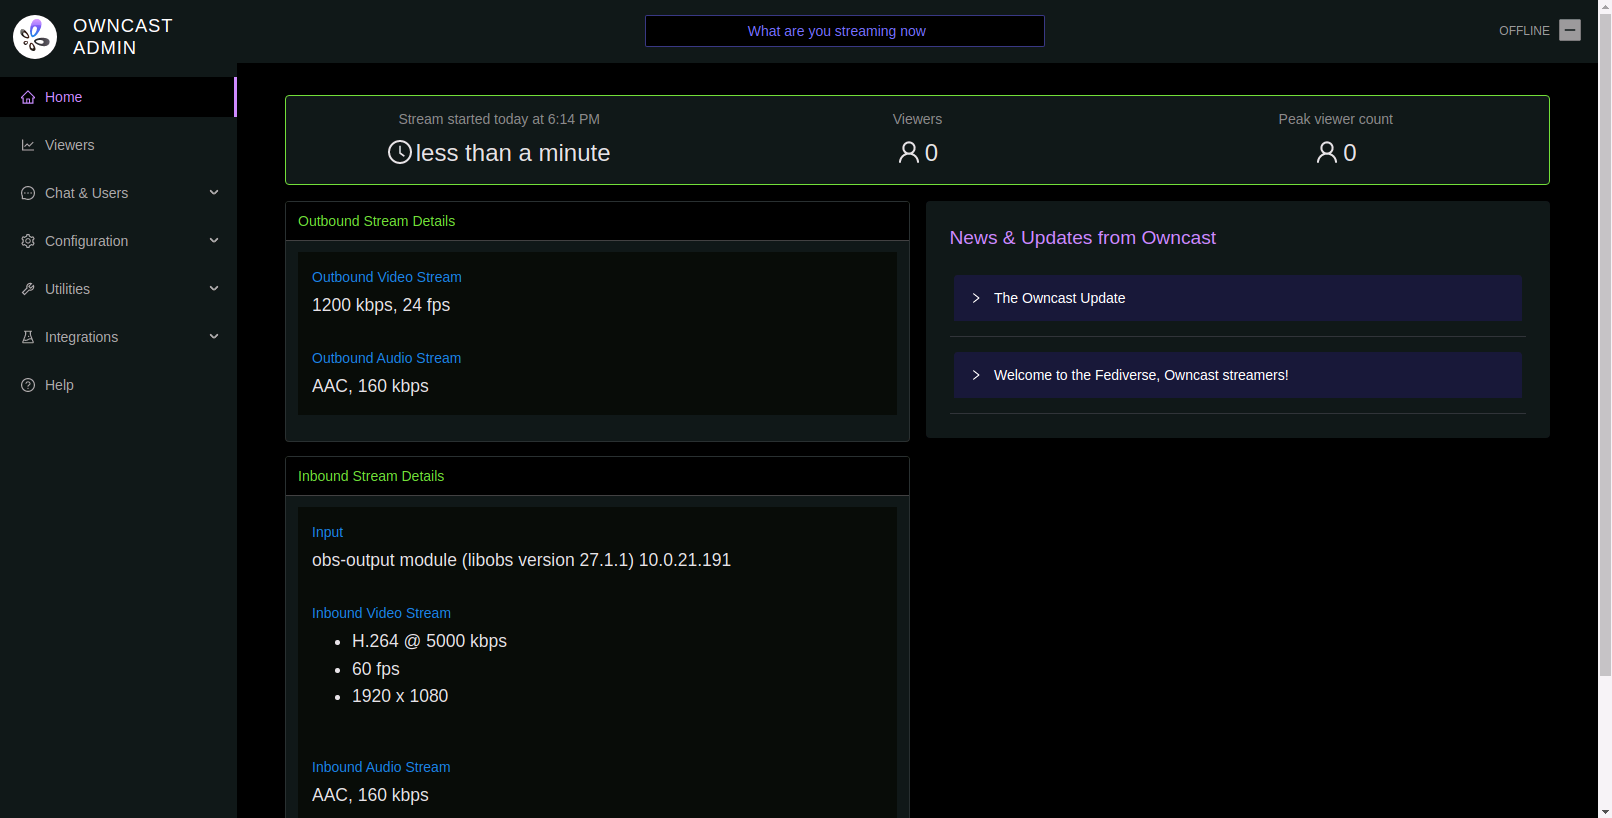
There is a great deal of information on our deployment here. Of particular note is the Forwarded Ports section: we can see that port 1935 has been exposed as port 30252. This will be important in a bit.
Initializing Owncast
Access the Owncast web server via the provided URI - in this case, http://nv81h8rkutf3jf24atvc2rheug.ingress.bdl.computer.
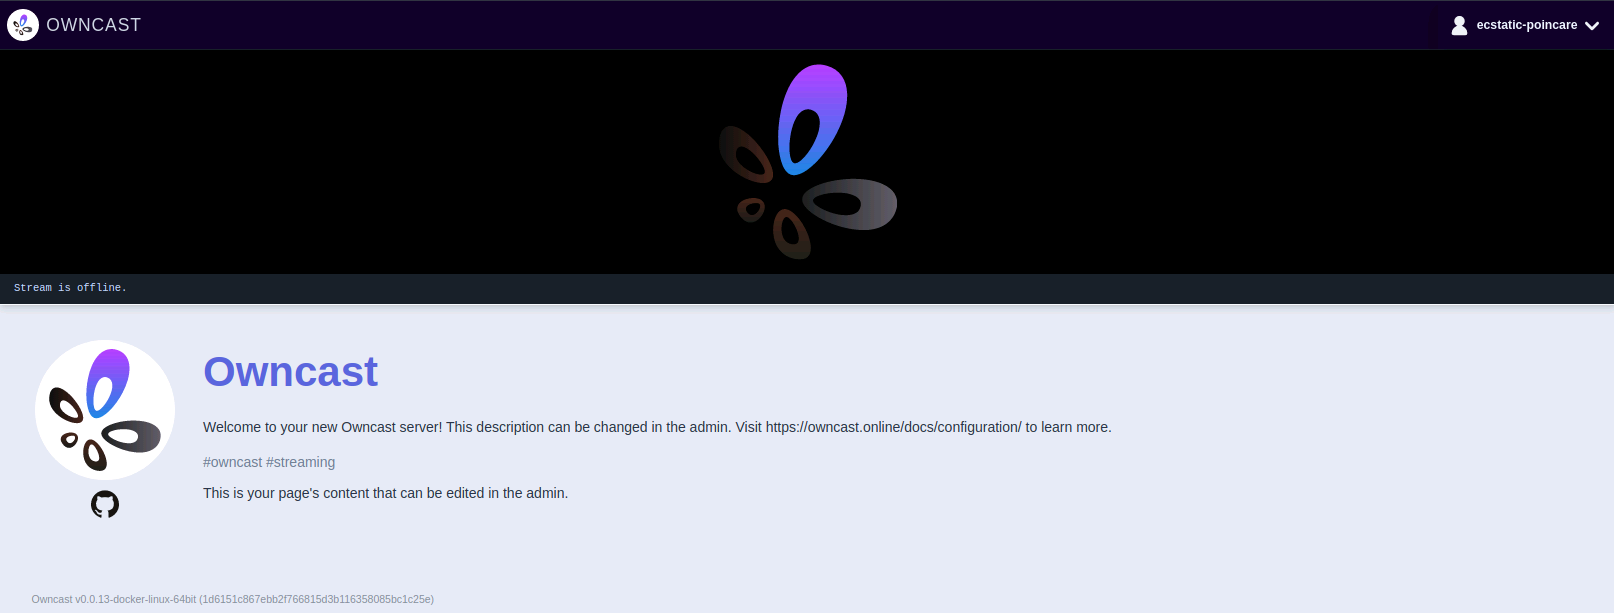
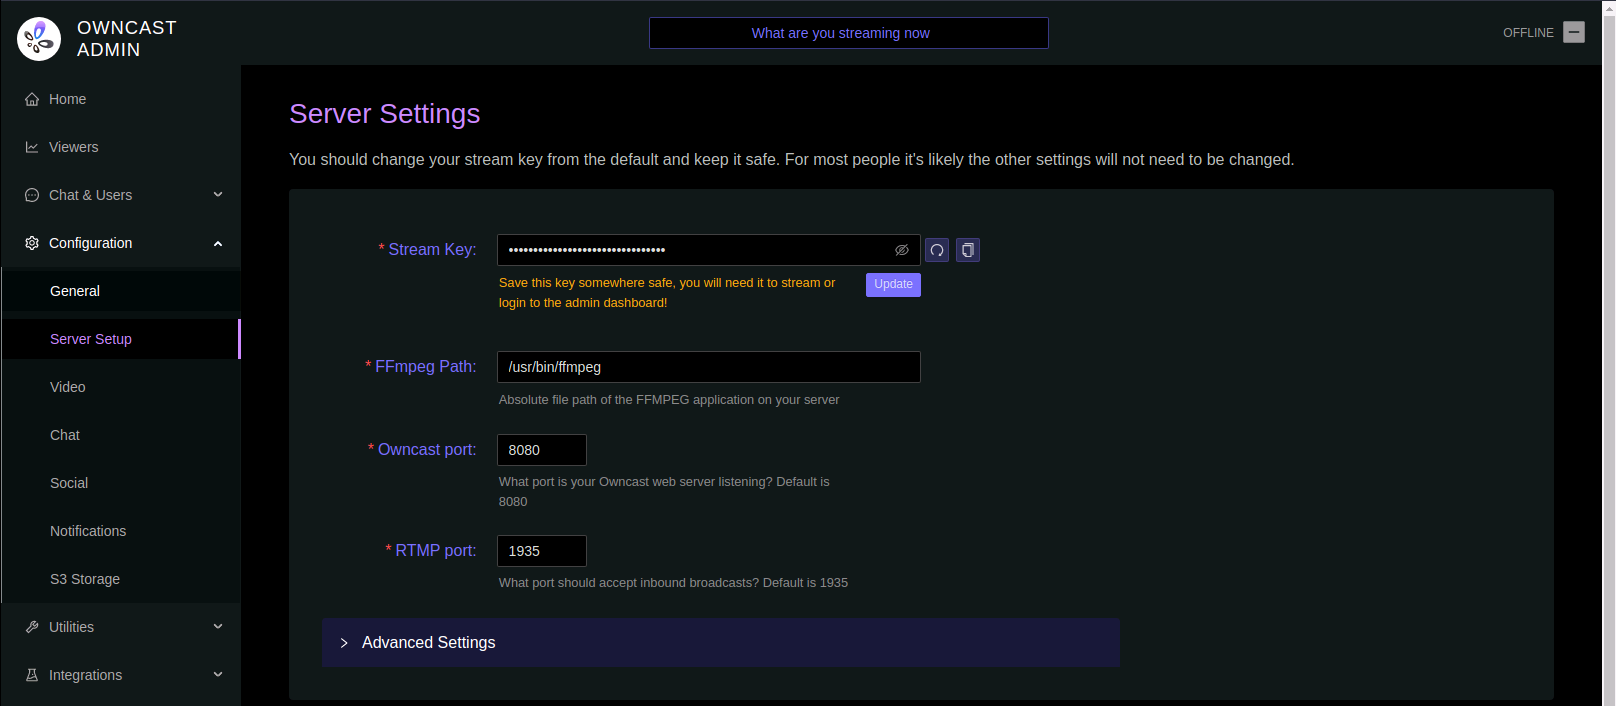
Comparing with the demo instance, our Owncast frontend looks good. Per the configuration documents, we should change the default credentials, which double as the Stream Key. Append /admin to the URI and login with the default credentials:
- username: admin
- password: abc123
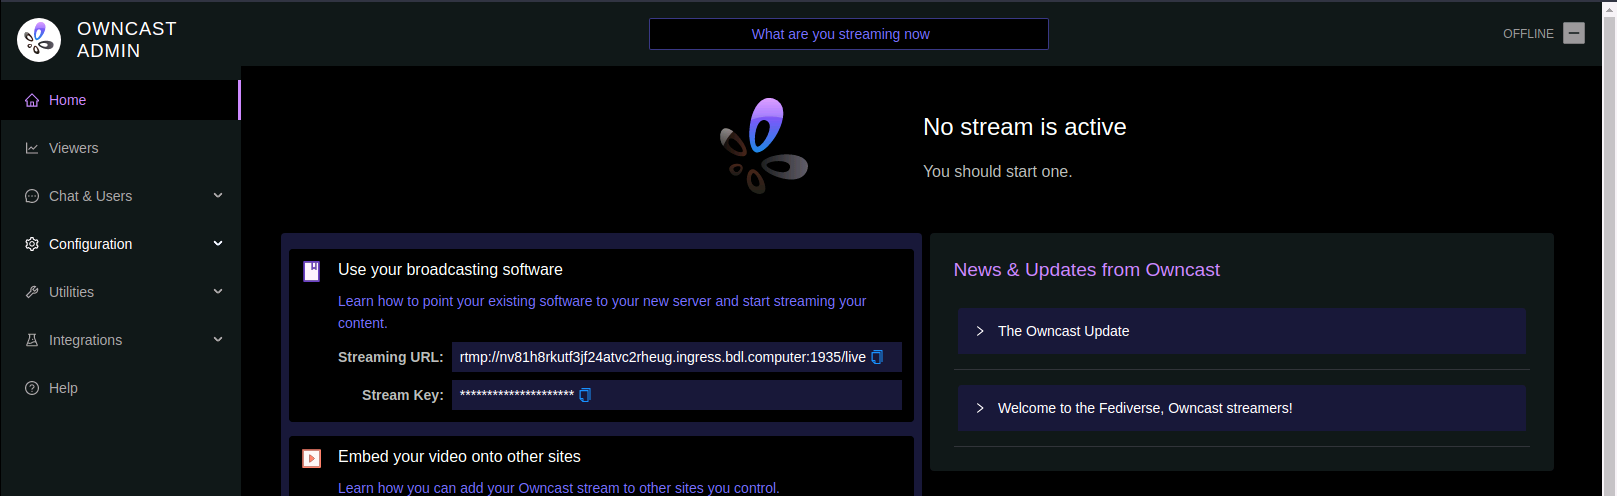
Once we’ve reached the admin panel, let’s go to Configuration > Server Setup. Regenerate a key, copy it, and click Update. Navigating to another page will re-prompt you for that password.
Streaming
As stated, this tutorial will not cover setting up a streaming environment in a particular broadcasting software - there are an abundance of guides for that (ex, OBS Studio Overview).
To broadcast to our Owncast environment using OBS, go to File > Settings and navigate to the Stream tab. Change Service to “Custom” and enter your RTMP Server and Stream Key. When specifying the RTMP server, substitute port 1935 for the port assigned by the provider in Step 3.

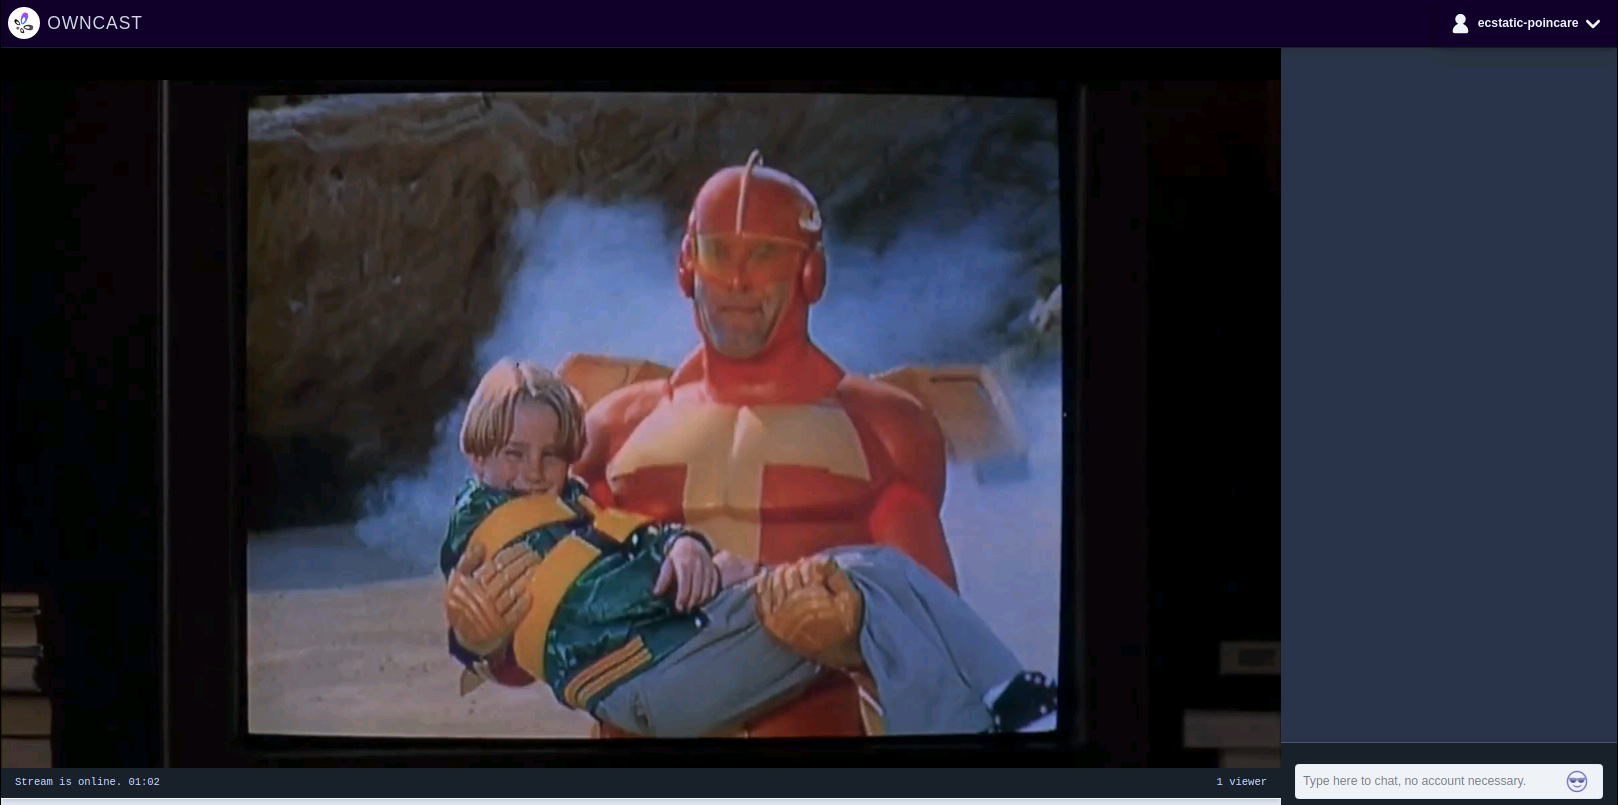
Save your settings and click “Start Streaming.” Your Owncast interface should change on the backend - navigating to the frontend, you should see your video feed.
Review
Additional Information
- There are many moving parts when it comes to video streaming - be aware of both your client and server settings (client bitrate, server latency buffer, encoding). You will need to adjust these based on what you’re trying to stream.
- Sometimes even simple deployments can run into issues depending on the Akash provider. Experiment with other providers if you’re having issues deploying to just one.
- Depending on what you stream and the size of your audience, you may be able to get away with using fewer system resources or you may need to increase them. Modify lines 15-24 in the provided SDL.
- This SDL uses ephemeral storage rather than persistent storage. In the context of Akash, this means if your provider’s server encounters a problem that affects your container, your storage volume is wiped - that includes your settings and stream key. To ensure these settings remain, you will need to deploy using persistent storage. See Akash Network docs for more information on persistent storage. The following SDL can be used to deploy Owncast with persistent storage:
---
version: '2.0'
services:
  owncast:
    image: 'gabekangas/owncast:latest'
    expose:
      - port: 8080
        as: 80
        to:
          - global: true
      - port: 1935
        as: 1935
        to:
          - global: true
    params:
      storage:
        data:
          mount: /mnt/data
          readOnly: false
profiles:
  compute:
    owncast:
      resources:
        cpu:
          units: 2
        memory:
          size: 2Gi
        storage:
          - size: 16Mi
          - name: data
            size: 2Gi
            attributes:
              persistent: true
              class: beta2
  placement:
    dcloud:
      pricing:
        owncast:
          denom: uakt
          amount: 1000
deployment:
  owncast:
    dcloud:
      profile: owncast
      count: 1
tl;dr:
- install Cloudmos Deploy, import or create a wallet, generate a certificate
- deploy Owncast SDL to provider
- open web frontend, change Stream Key in admin panel
- copy Streaming URL from admin panel, changing 1935 to whatever port was assigned by the provider
- enter Streaming URL and Stream Key in broadcasting software
- begin streaming
Additional resources
Owncast
https://owncast.online/quickstart/container/
https://owncast.online/docs/